Import Revolut Business Expenses into Bexio Accounting Automatically
This guide is tailored for Revolut Business (black app).
If you're using Revolut Personal (white app), check out this guide instead: Revolut Personal Statements for import in Bexio
Earlier versions of Revolut expenses only exported expenses which
- do have a linked receipt
- or were manually marked as expenses.
If you decide to use Revolut expenses instead of Revolut transactions, ensure to mark all transactions as expenses in Revolut before exporting them.
➡️ We recommend using the Revolut Transactions for import in Bexio importer instead.
Your CSV File from Revolut
Assuming the CSV/Excel file you want to import into Bexio has the following structure:
Revolut updated their CSV export format in Nov/Dec 2023.
New format since Nov/Dec 2023:

Old format until Nov/Dec 2023:

If you fill out the category name and tax name columns in Revolut:
1. Set Up a New Import Channel
Follow the quick start guide to establish the import channel.
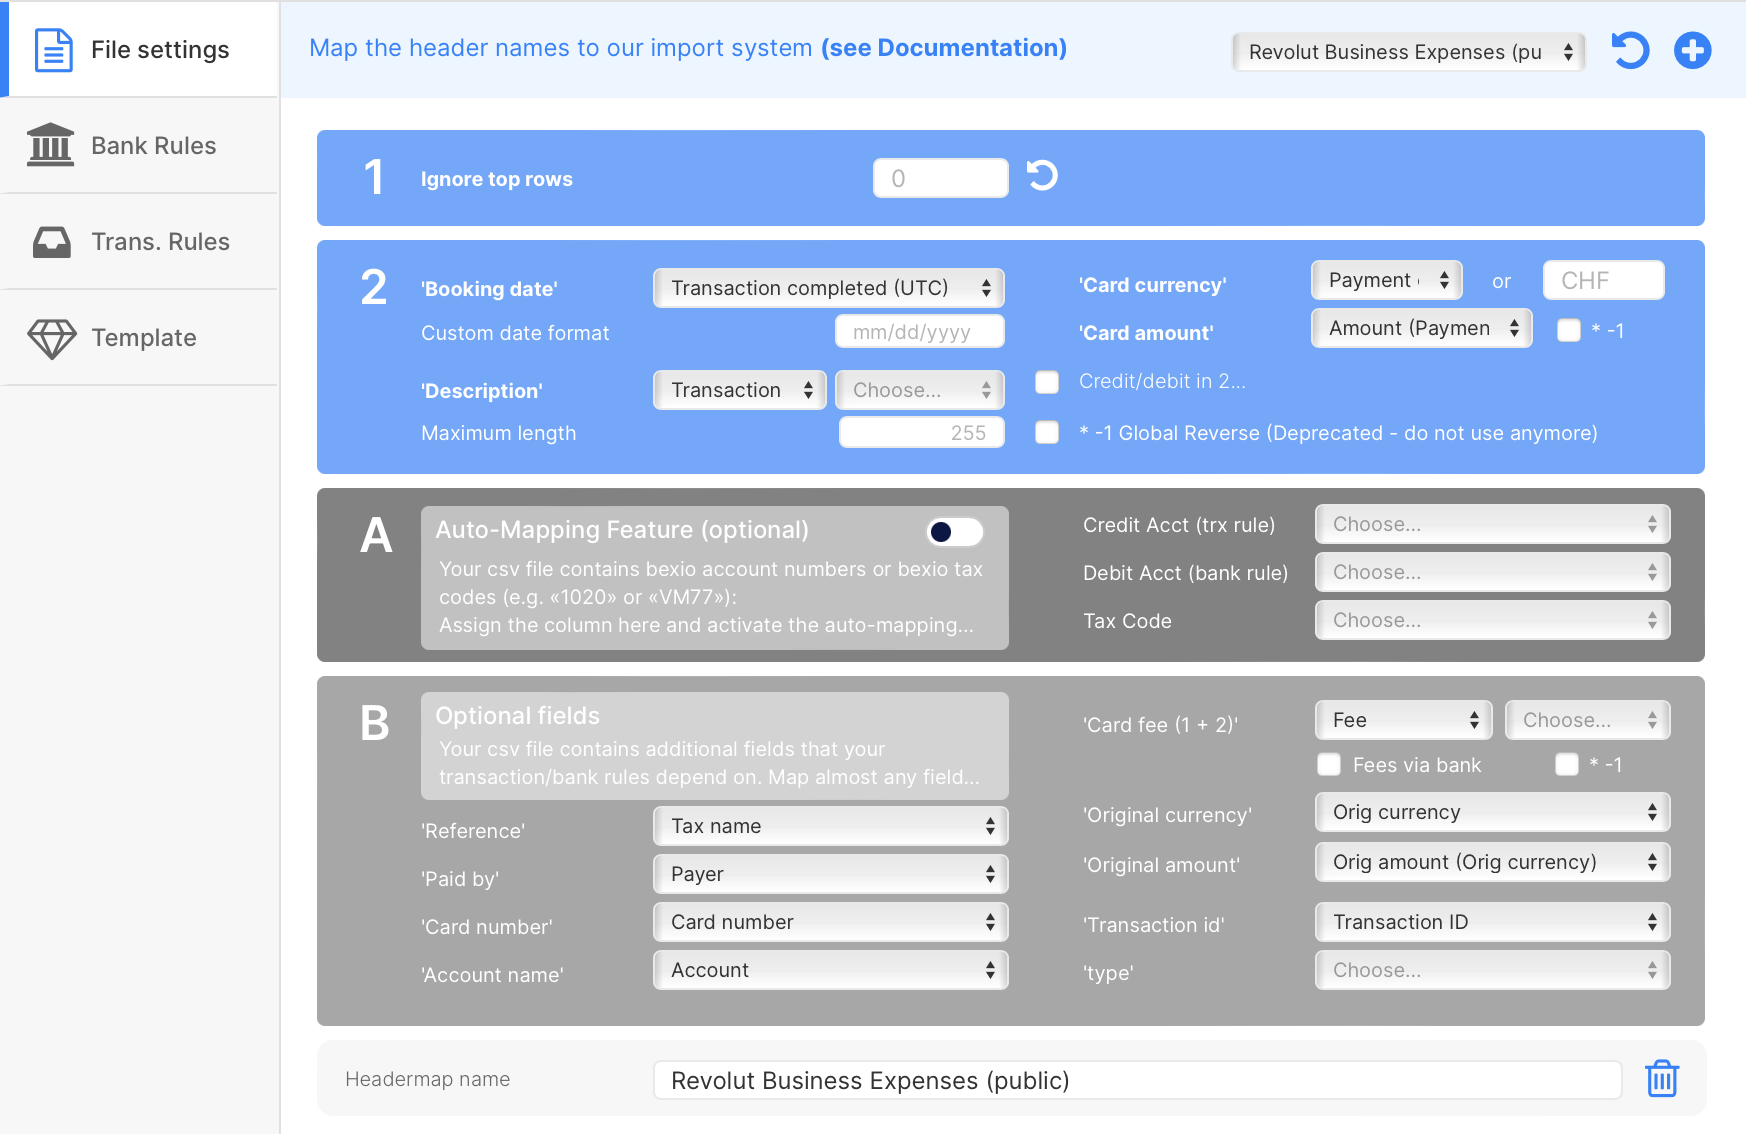
During setup, choose the header template: Revolut Business Expenses (public).
Then click on Load (Refresh button).
If your file has different column names or you use a different credit card issuer, no worries. Create a custom header template or request our assistance:
a) Create a New Template
- Click on the plus sign with no header template selected.
- If a header template is selected, change it to empty, click Load, then click the plus sign.
- more info
b) Duplicate an Existing Template
- Select the header template, click Load (Refresh button), and then click the plus button. This creates a copy of the current template.
- more info
c) Ask for Help
- Or request the free setup service
- Or contact us for additional assistance
2. Process Your First File
After setting up the import channel, follow this guide to process your first file.