How to use
How to use the CSV Importer to process your transactions.
This guide assumes that you have already setup a new import channel.
1. Walk through your file
If your file already has the correct bexio account and/or tax code, please check out our automapping feature. In all other cases you have to walk through your transactions and add additional transaction rules to define which transactions will be booked on what expense account.
Add a new rule
Click on New Acct. rule to add a new rule.

This will open a new window where you can define the rule:
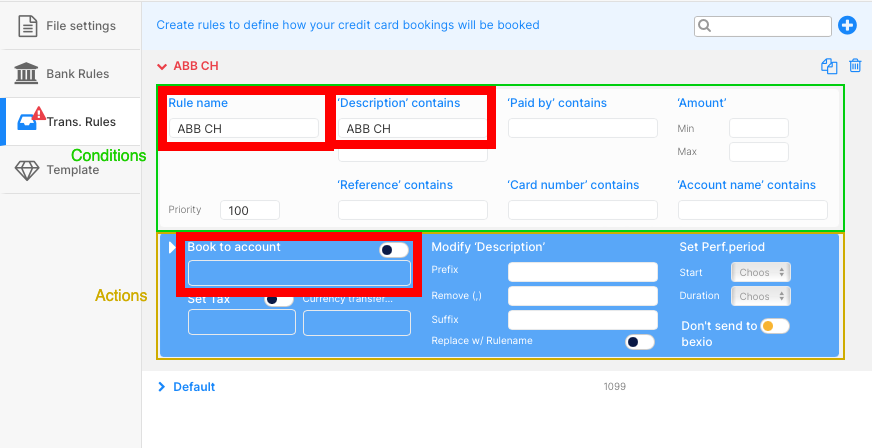
In most cases you will use the following 3-4 fields:
rule name required
Give the rule a name. This is only for your reference and will not be used in the import process. We recommend it to name it after the most dominant conditions.
description contains (or any other condition, at least one) required
This would mean, that if the transaction's description contains the word ABB CH, the rule will apply.
- It is best to use the shortest possible character string that allows a transaction to be uniquely identified. In this case
ABBmight be sufficient and would be more robust for future changes - e.g. if the transaction's description changes toABB Switzerland AGin the future, the conditionABBwould still apply, while theABB CHwouldn't match anymore. - But be careful: the condition
ABBwould also a match a transaction namedcabbage.com. In this case, it might be wiser to useABB CHas the condition or to increase the priority of the rulecabbage.comto make sure that this rule will get applied first.
book to account required
Set the bexio bank account number (usually an expense account) where the transaction should be booked to.
tax code optional
Please only set a taxcode if you're company is subject to VAT. Otherwise leave it empty.
Edit a rule
A transaction with a rule applied will be marked blue. You can edit the rule by clicking on the rule name on top of the transaction.

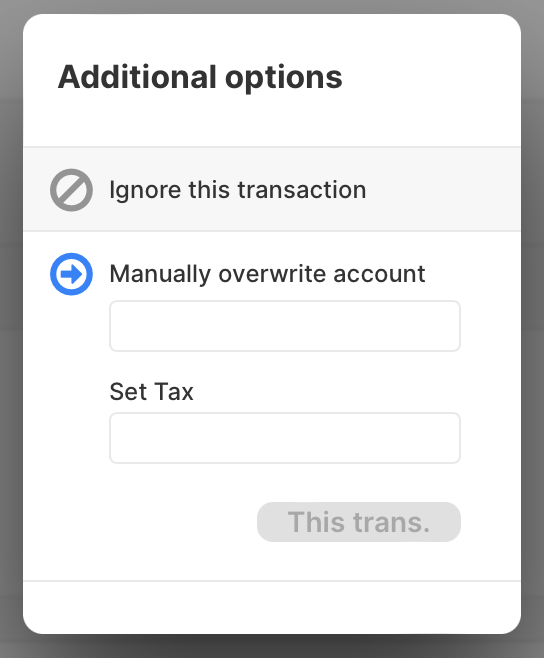
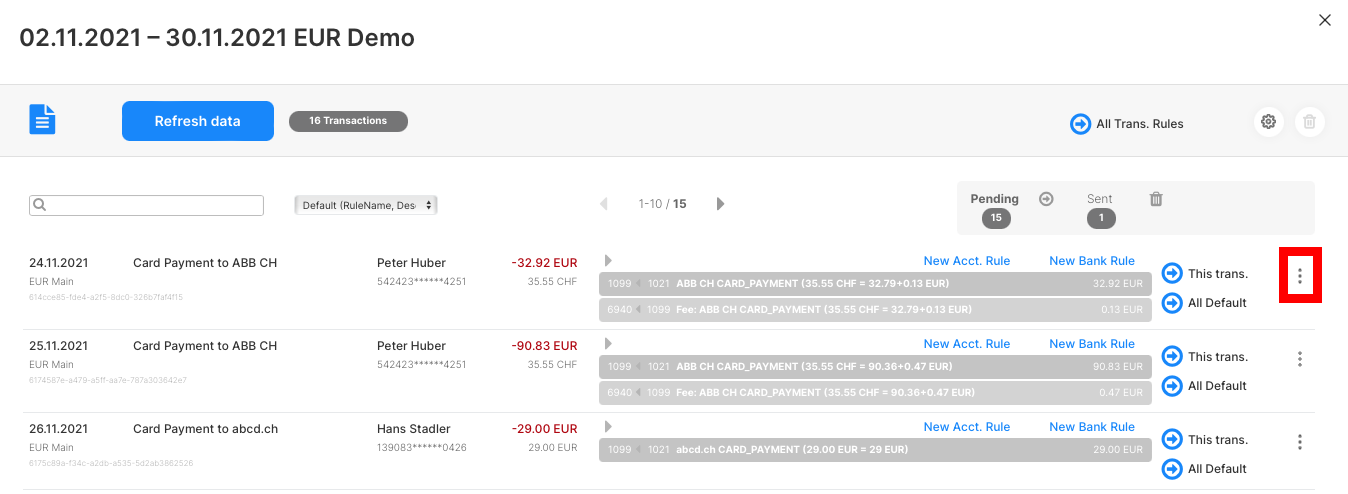
Manual override
If you want to override the rule for a single transaction, you can do so by clicking on the three dots on right hand side of the transaction. Now you can either ignore a transaction or set a different account / tax code.
2. Send transactions
You can send transactions to bexio in three different ways:
Send a single transaction
You can send one single transaction by clicking on the send button «This trans.» on the right side of the transaction.
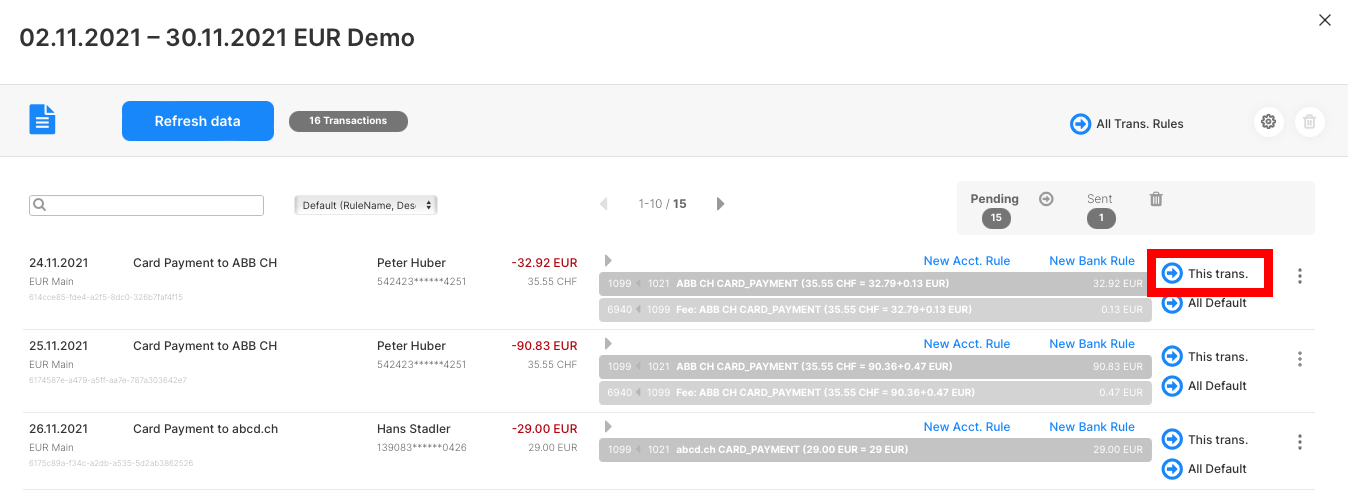
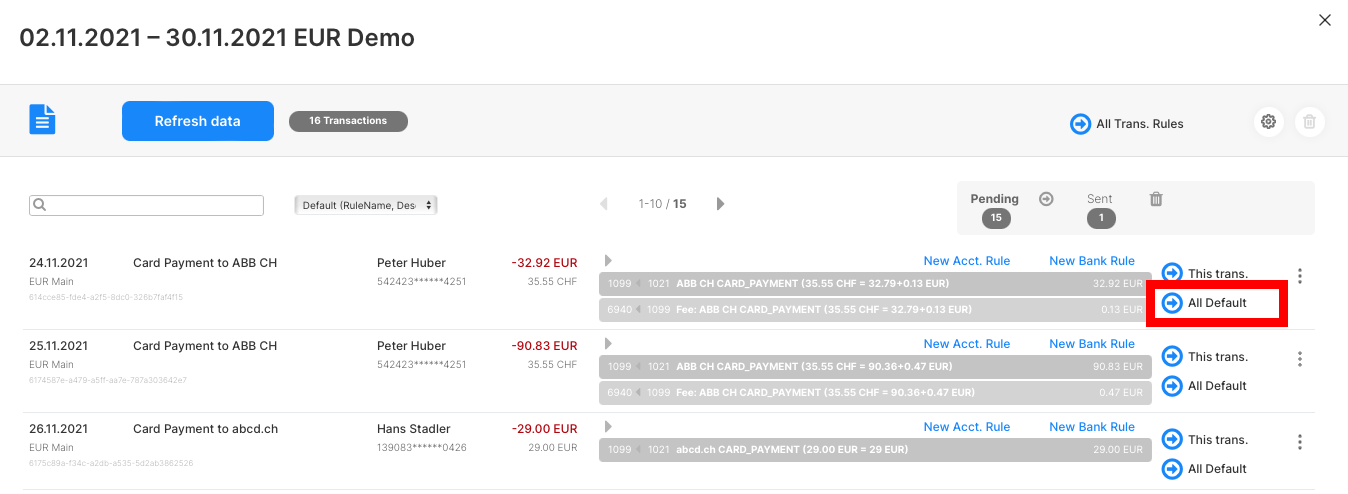
Send transactions of one rule
If you want to send all transactions of the same rule, you can click on the send button «All rulename» on the right side of the transaction.
This is escpecially useful if you create new rules or if you want to check if all transactions got the correct rule applied. As soon as you've checked one rule, you can send all transactions of this rule to bexio.
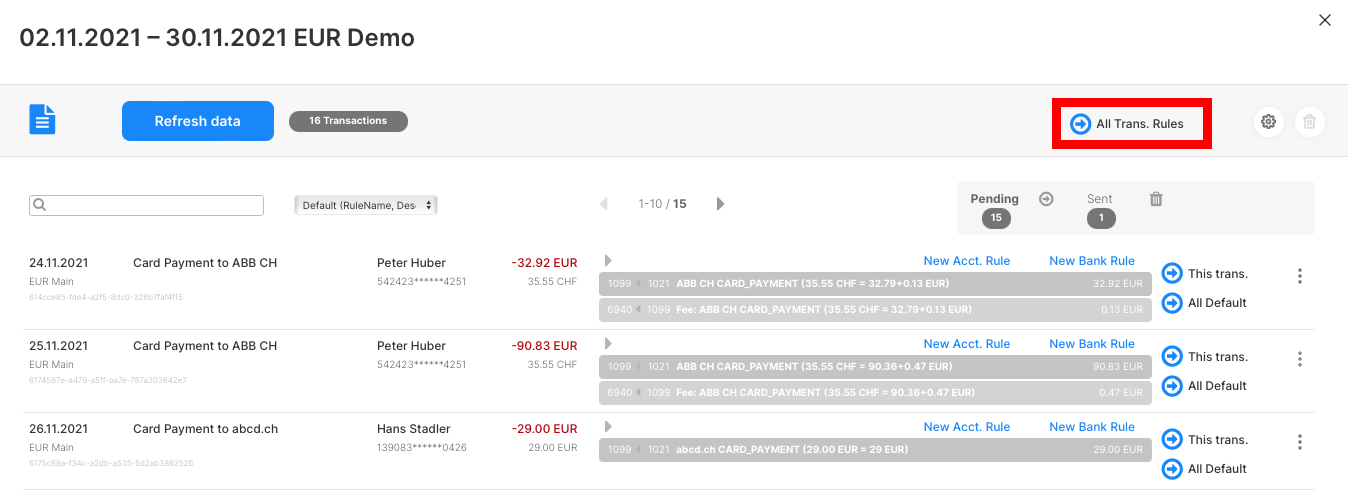
Send all transactions
If you don't want to check the transactions, you can send all blue transactions (blue = a rule got applied) by clicking on the send button «All Trans. rules» on the top right.
This will send all transactions with an applied rule (blue) except the ones with the default rule (= gray colored).
The transfer to bexio
Waiting loop
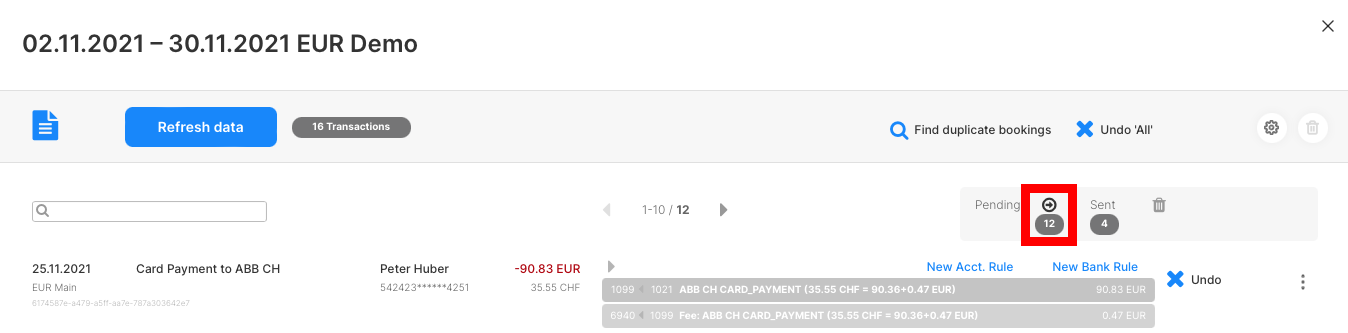
All transactions which have to be sent to bexio are stored in a waiting loop. Which will automatically send the transactions to bexio in the background. You can see all transactions which are waiting to be sent in the waiting loop view.
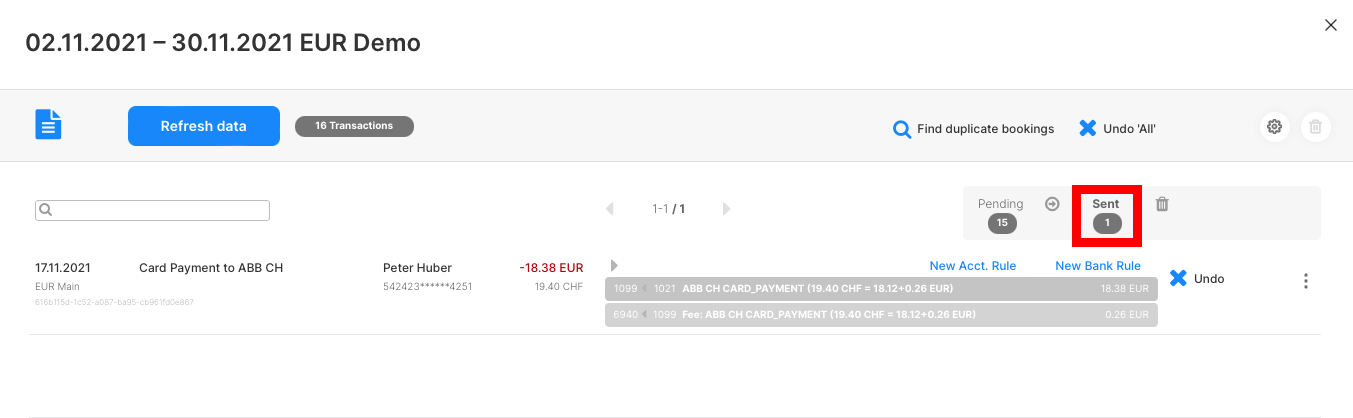
Sent transactions
As soon as the transaction was successfully sent to bexio, it will be moved to the sent transactions view.
You can see all transactions which were successfully sent to bexio in the sent transactions view. You can also undo a transaction by clicking on the undo button. This will remove the transaction (using a delete waiting loop) from bexio and move it back to the pending view.
You can also view the transaction in bexio by clicking on the three dots on the right hand side of the transaction.
Errors
The sending stops automatically if an error occurs. In most cases the reason of the error will be displayed in the error view in yellow / red.
Click on undo, correct the issue and send the transaction again. This will automatically trigger the sending of all transactions waiting in the waiting loop. Besides that you can trigger the sending of the transactions waiting in the waiting loop, click on the reload data button.

For troubleshooting, please refer to the troubleshooting documentation.
3. Validate
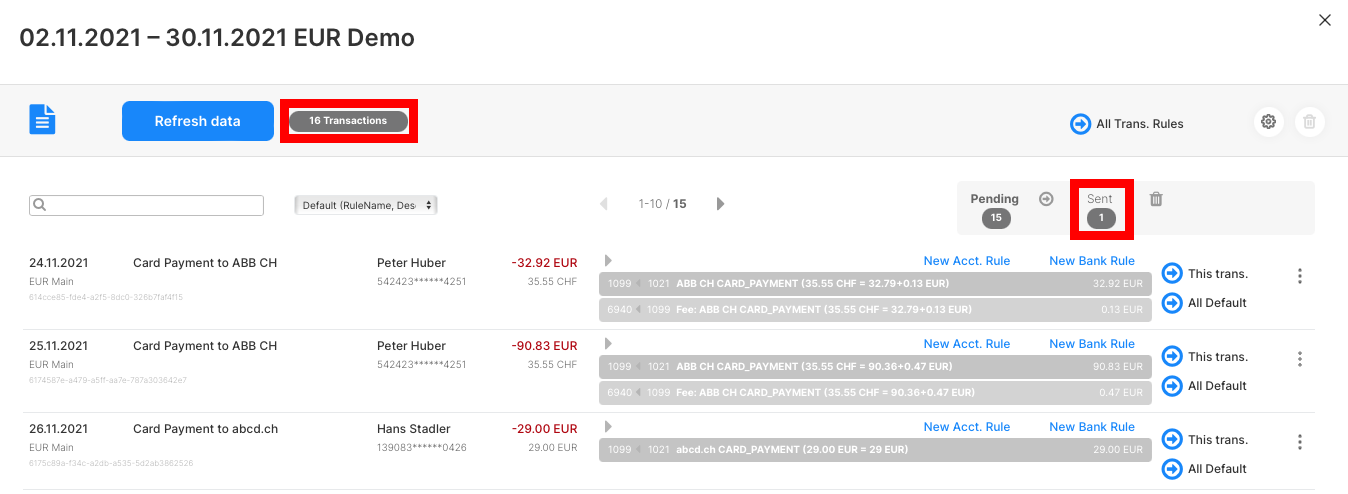
The goal is that all transactions will be displayed in the sent transactions view.
To check that everything worked as expected, make sure the following counts are equal:
- the original transaction count (top of the file)
- with the sent count (below sent).
If the counts are not equal, check if any other view contains transactions. If that's not the case, trigger the search for duplicate bookings (click on the sent > Find duplicate bookings. This will automatically search bexio for double entries). If this doesn't resolve the issue contact us.
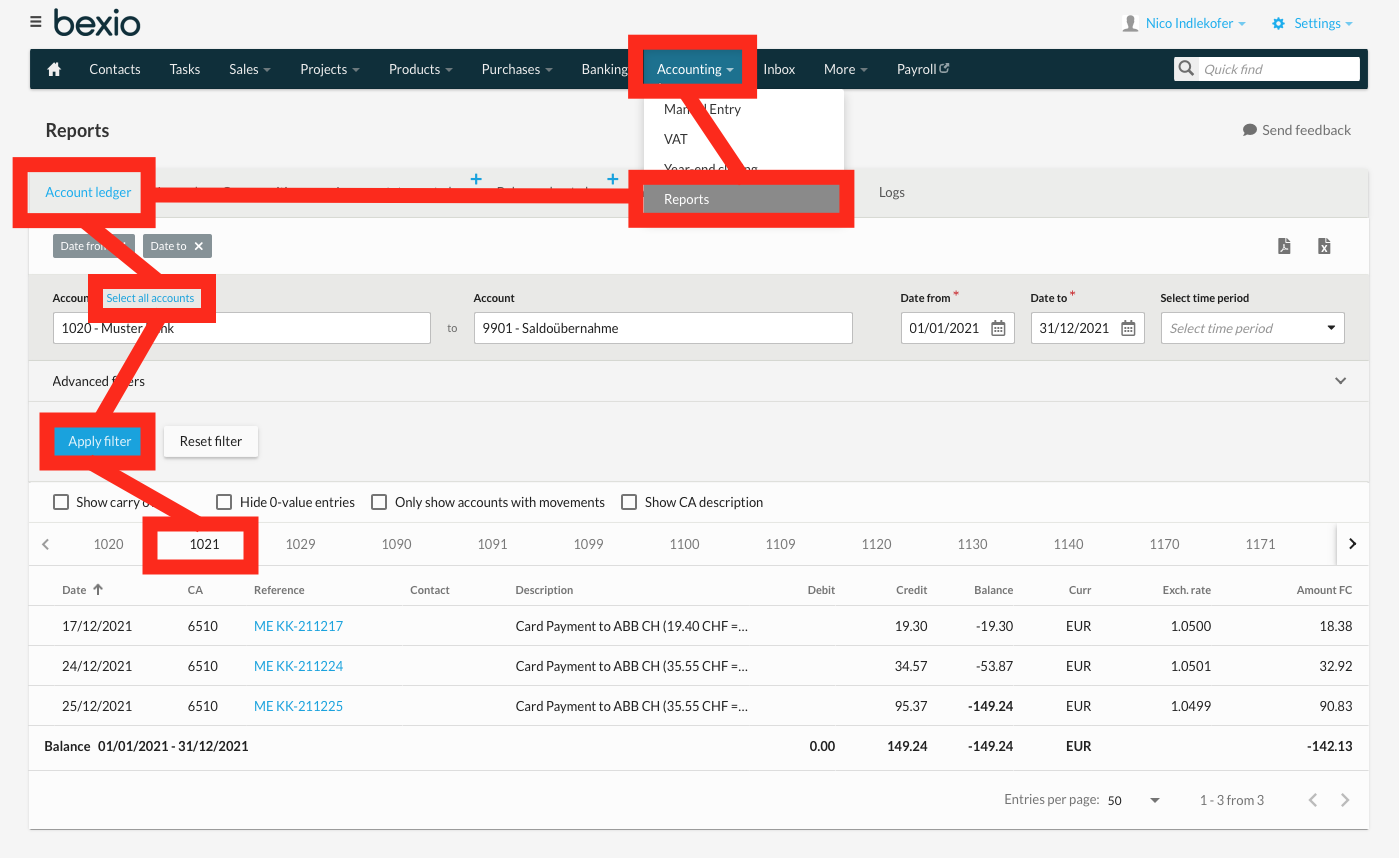
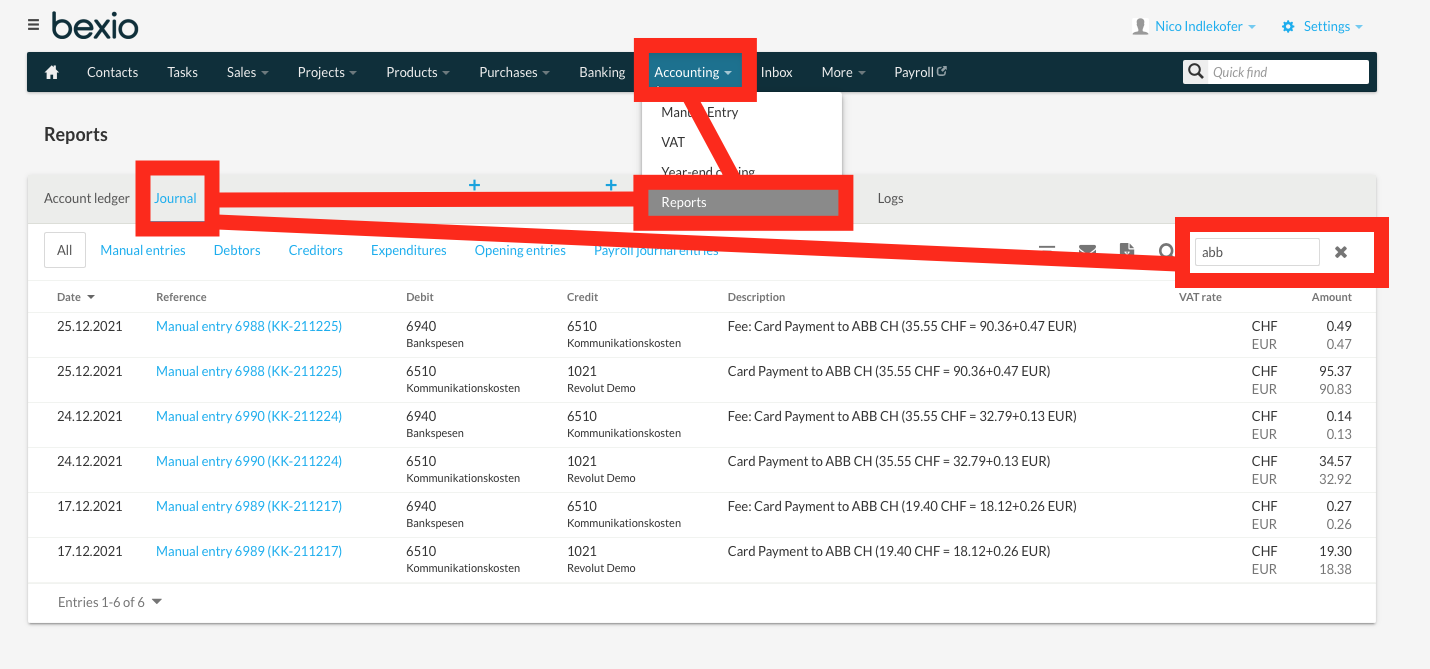
4. View the transactions in bexio
The transactions are sent as manual journal entries to bexio. You can view the transactions in bexio in the account sheets or in the journal.
Access them directly in bexio
You can find the transactions in bexio in the account ledger:
or in the journal:
From accrio
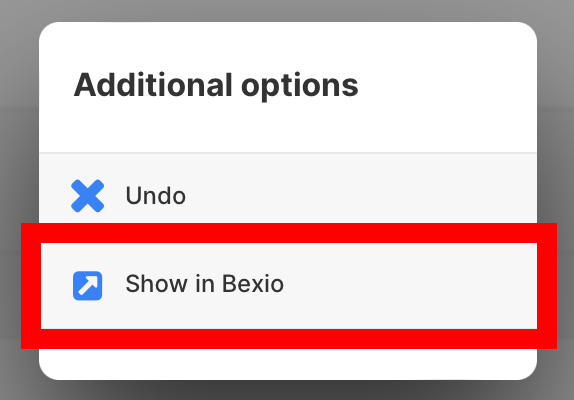
If you're already logged in in the related bexio account, you can click on the three dots on the right hand side of the transaction:
Then in the popup click on view in bexio.
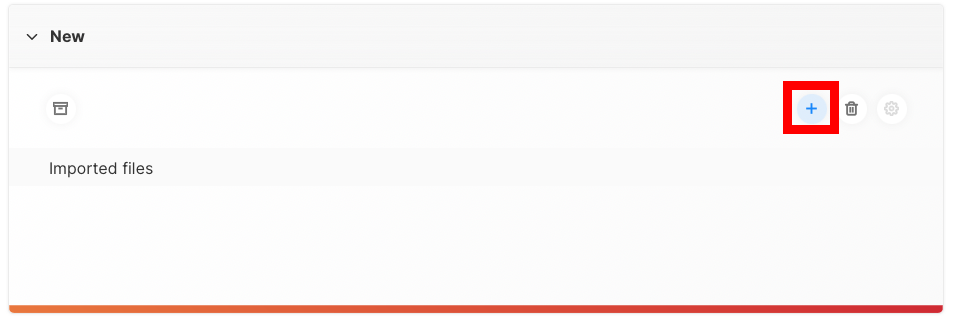
5. Import the next file
For all future imports of this type, just click on the plus sign again to upload the new file. Since the setup & all existing rules will be applied automatically you can directly continue with step 1 / step 2.
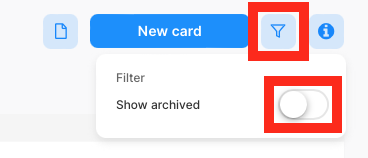
6. Archive imported files
This is just for your convenience and will not affect the import process.
If you want to keep you default view tidy, you can hide files from the default view by clicking on the archive button on the left hand side of the file. This will archive the file and the file won't be shown in the default view anymore.
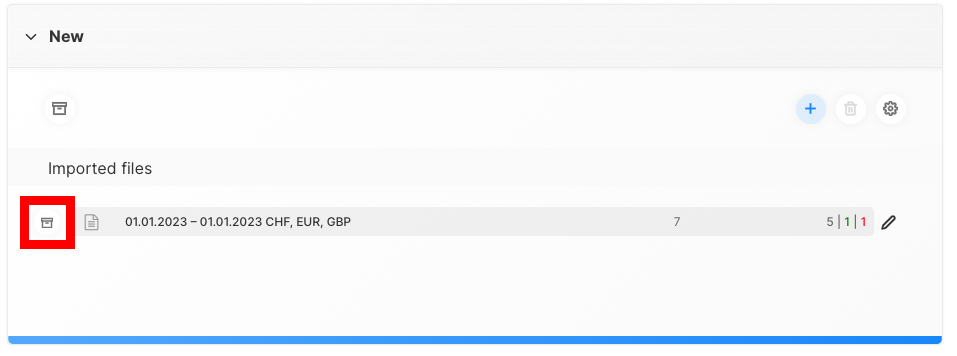
To access an archived file, click on the filter icon and then on show archived.