Import journal booking entries into bexio accounting automatically
With accrio you can import any transactional data (e.g. from your bank, credit card, your old accounting software, payment provider, your erp system, etc.) into bexio accounting automatically as long as you can export it as an CSV, TXT or XLSX file. This is especially practical if you have a lot of transactions to process or want to import journal entries you've created manually in excel.
Download our journal template files 📄 here for import in bexio.
CSV / TXT / XLSX:
These template files can be imported directly. Simply create your bookings in the template file and drag & drop the file into the import window.
Apple Numbers:
The template files for Apple Numbers can not be imported directly. You need to export the file as CSV (UTF-8) first. Click on File > Export To > CSV.
Your CSV or Excel file you want to import into bexio
- You can use our journal template files for import in bexio or use any existing csv/excel file you have.
- For this example, let's assume the CSV/Excel file you want to import into bexio has the following structure:
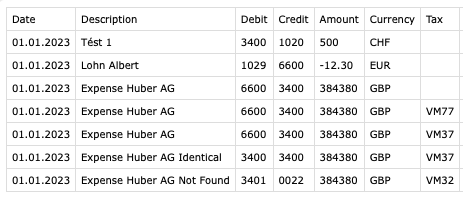
- The file already contains columns with the correct debit account, credit account and tax code
- Instead of defining rules to apply the correct debit/credit account, we use the automapping-feature, which will allow us to import and convert csv files to bexio journal bookings.
If your CSV File does not contain all three columns (debit account, credit account and tax code), you can still use the automapping-feature.
➡️ You just need to make sure that the columns you have, are mapped according correctly.
The account numbers / tax codes have to match exactly with the codes you use in bexio. Otherwise the automapping-feature will not work.
- debit/credit account: «1999» only maps to «1999» if this account exists in bexio.
- tax code: «VM77» will map to «VM77». «7.7» won't map, since there's no tax code with that name.
1. Import settings for bexio
Follow the quick start guide to set up the import channel. For steps 4-6, follow the instructions below.
File Settings
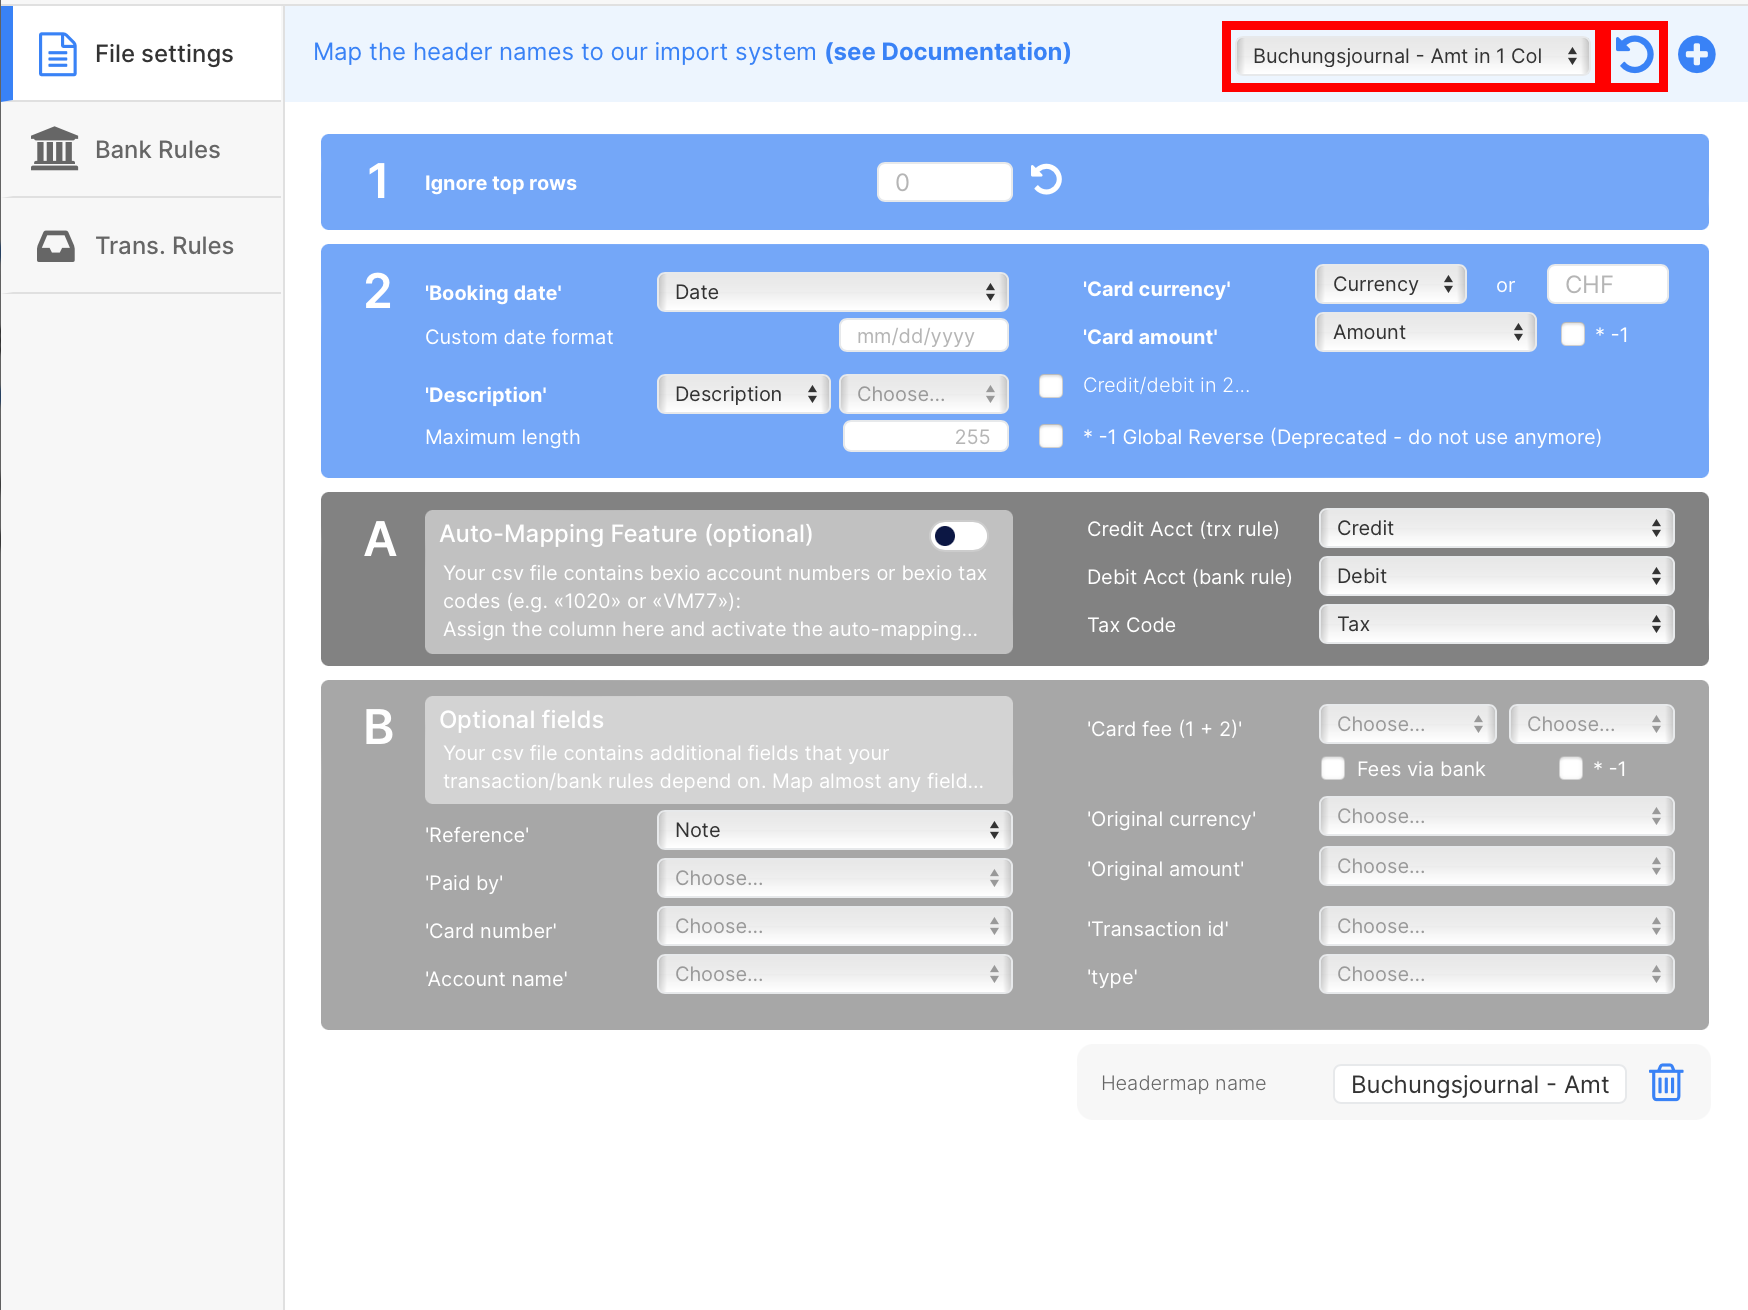
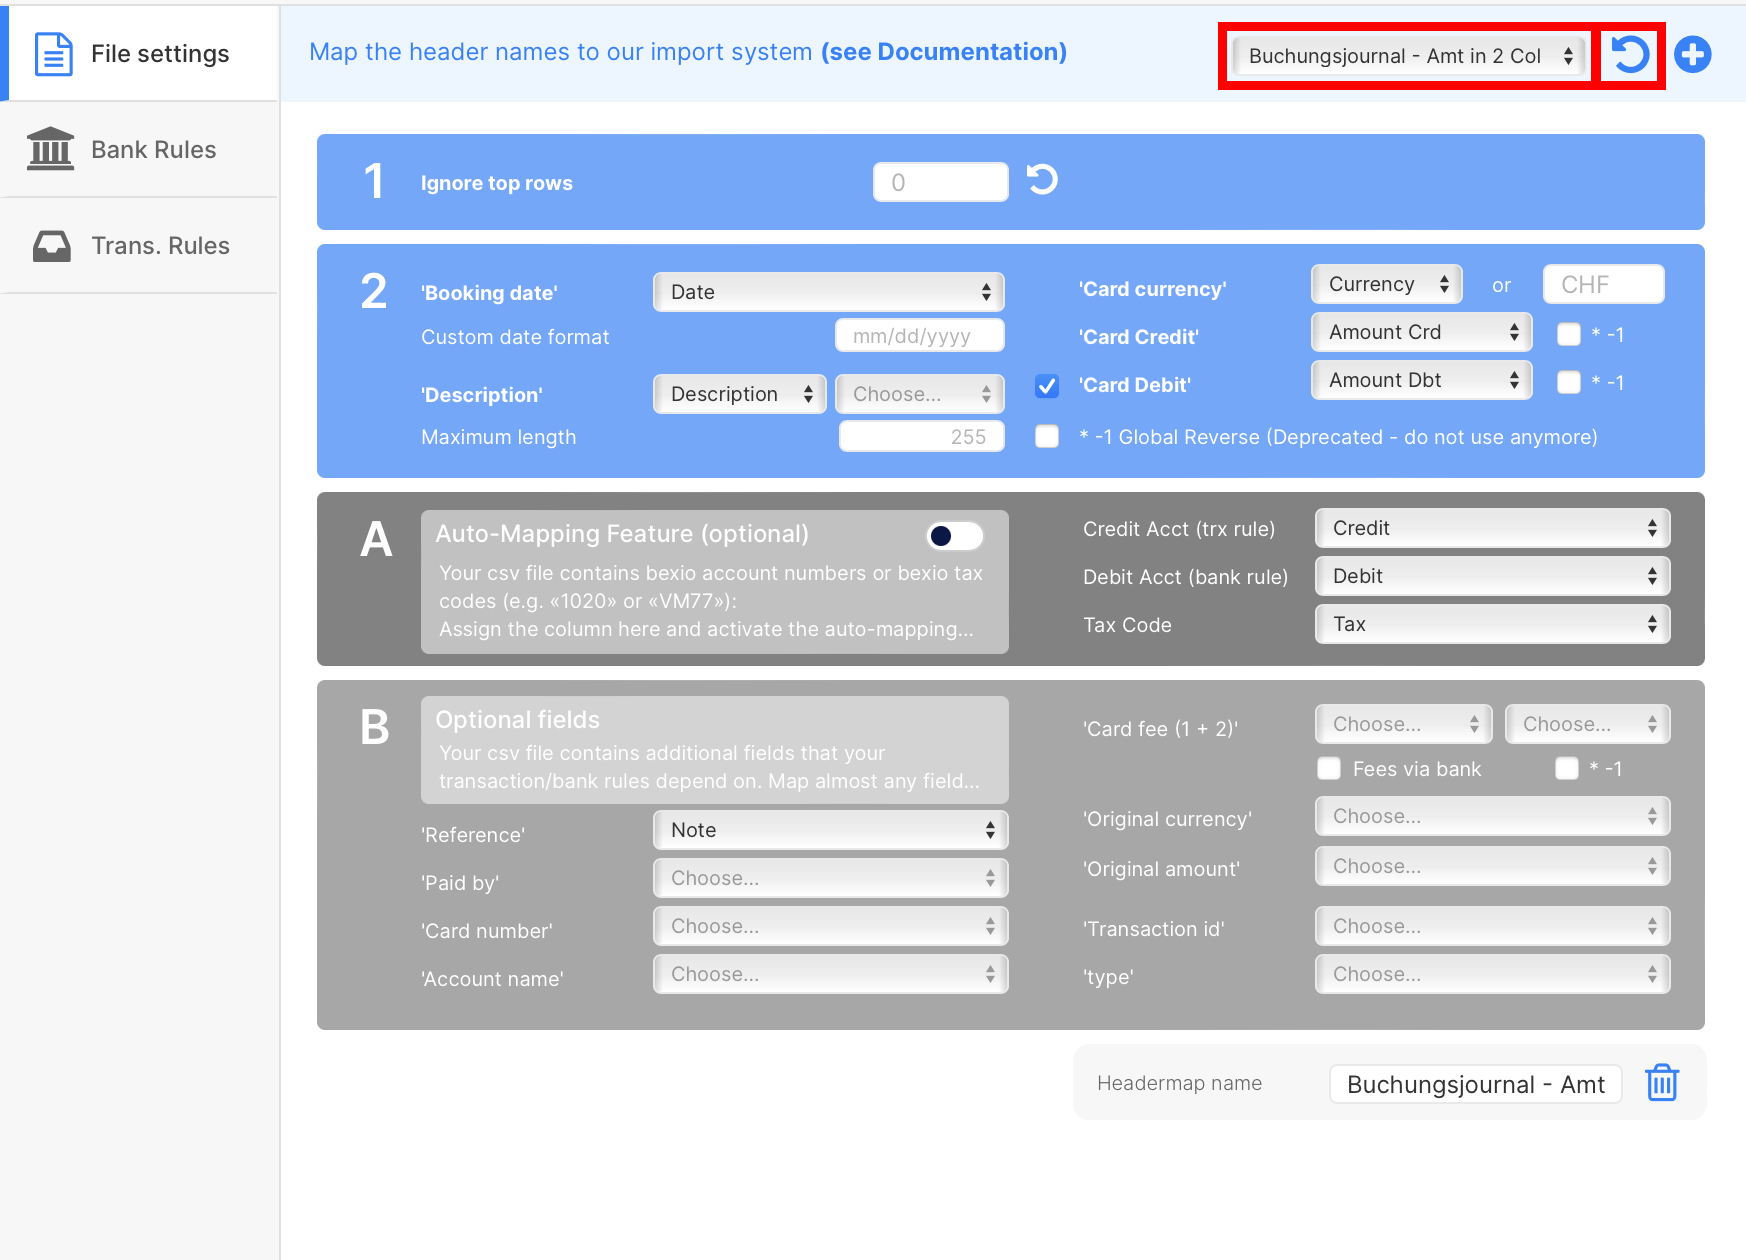
During the setup process you will be asked to select a header template. Use one of the following template and then click on Load (refresh icon).
Buchungsjournal - Amt in 1 col (public)
Buchungsjournal - Amt in 2 col (public)
Without a template
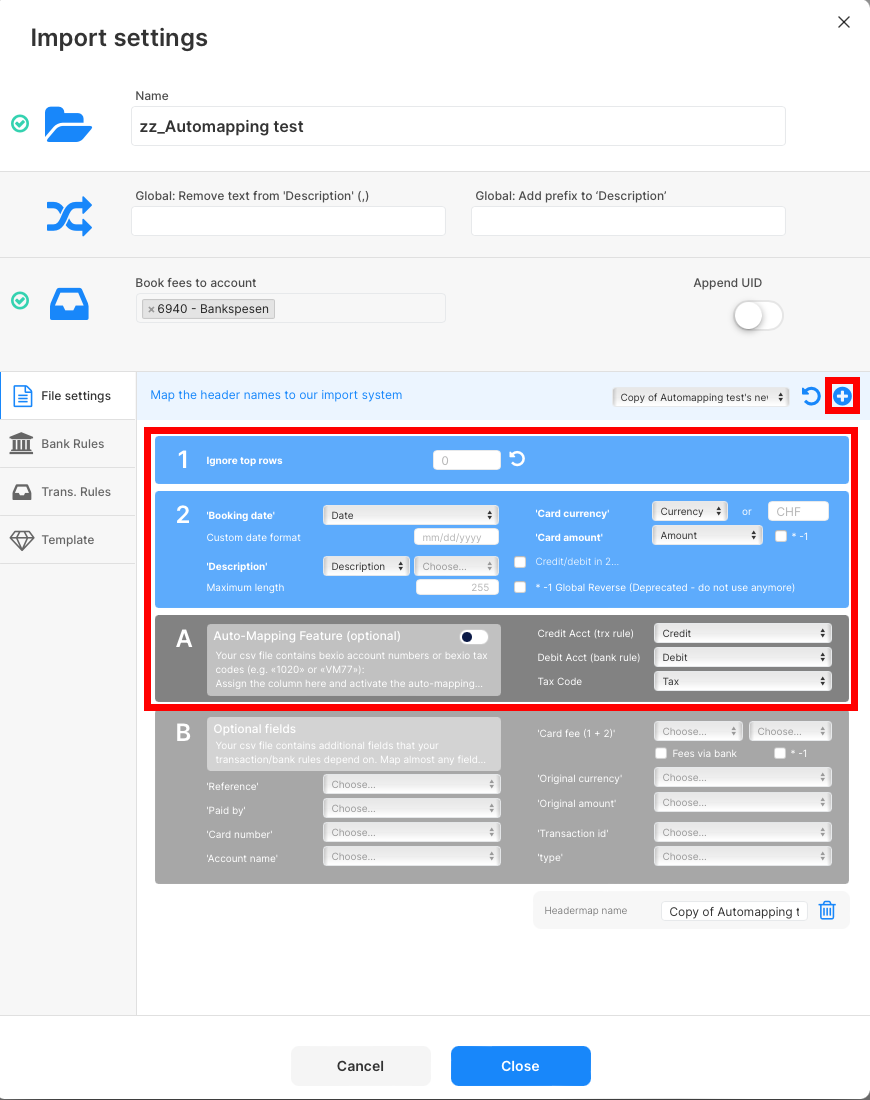
You can also create your own import template. For that click on the (blue ➕ sign) and map the columns as follows. More infos about how to create a custom template can be found here.
tipFor the automapping-feature to work, make sure section «A» is set up correctly.
Bank Rules
debit account
The only thing you need to do here, is to toggle the dark blue switch to «on».
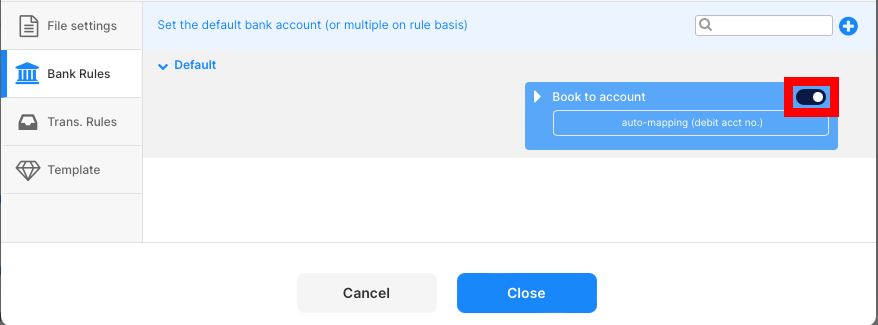
It is also possible to use the mapping feature only partially on some bookings. In this case you simply set up multiple bank rules and toggle the switch only on the ones you want to use the mapping feature.
Journal Bookings
credit account + tax code
The only thing you need to do here, is to toggle the dark blue switches to «on»:
- book to account if you want to auto map the credit account
- set tax if you want to auto map the tax code (VAT) ➡️ do not use if your company is not subject to VAT
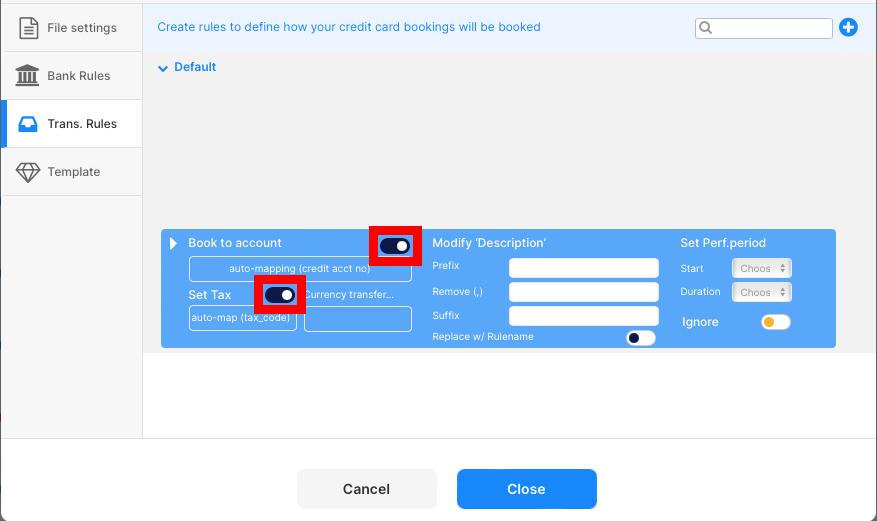
It is also possible to use the mapping feature only partially on some bookings. In this case you simply set up multiple transaction rules and toggle the switch only on the ones you want to use the mapping feature.
Result
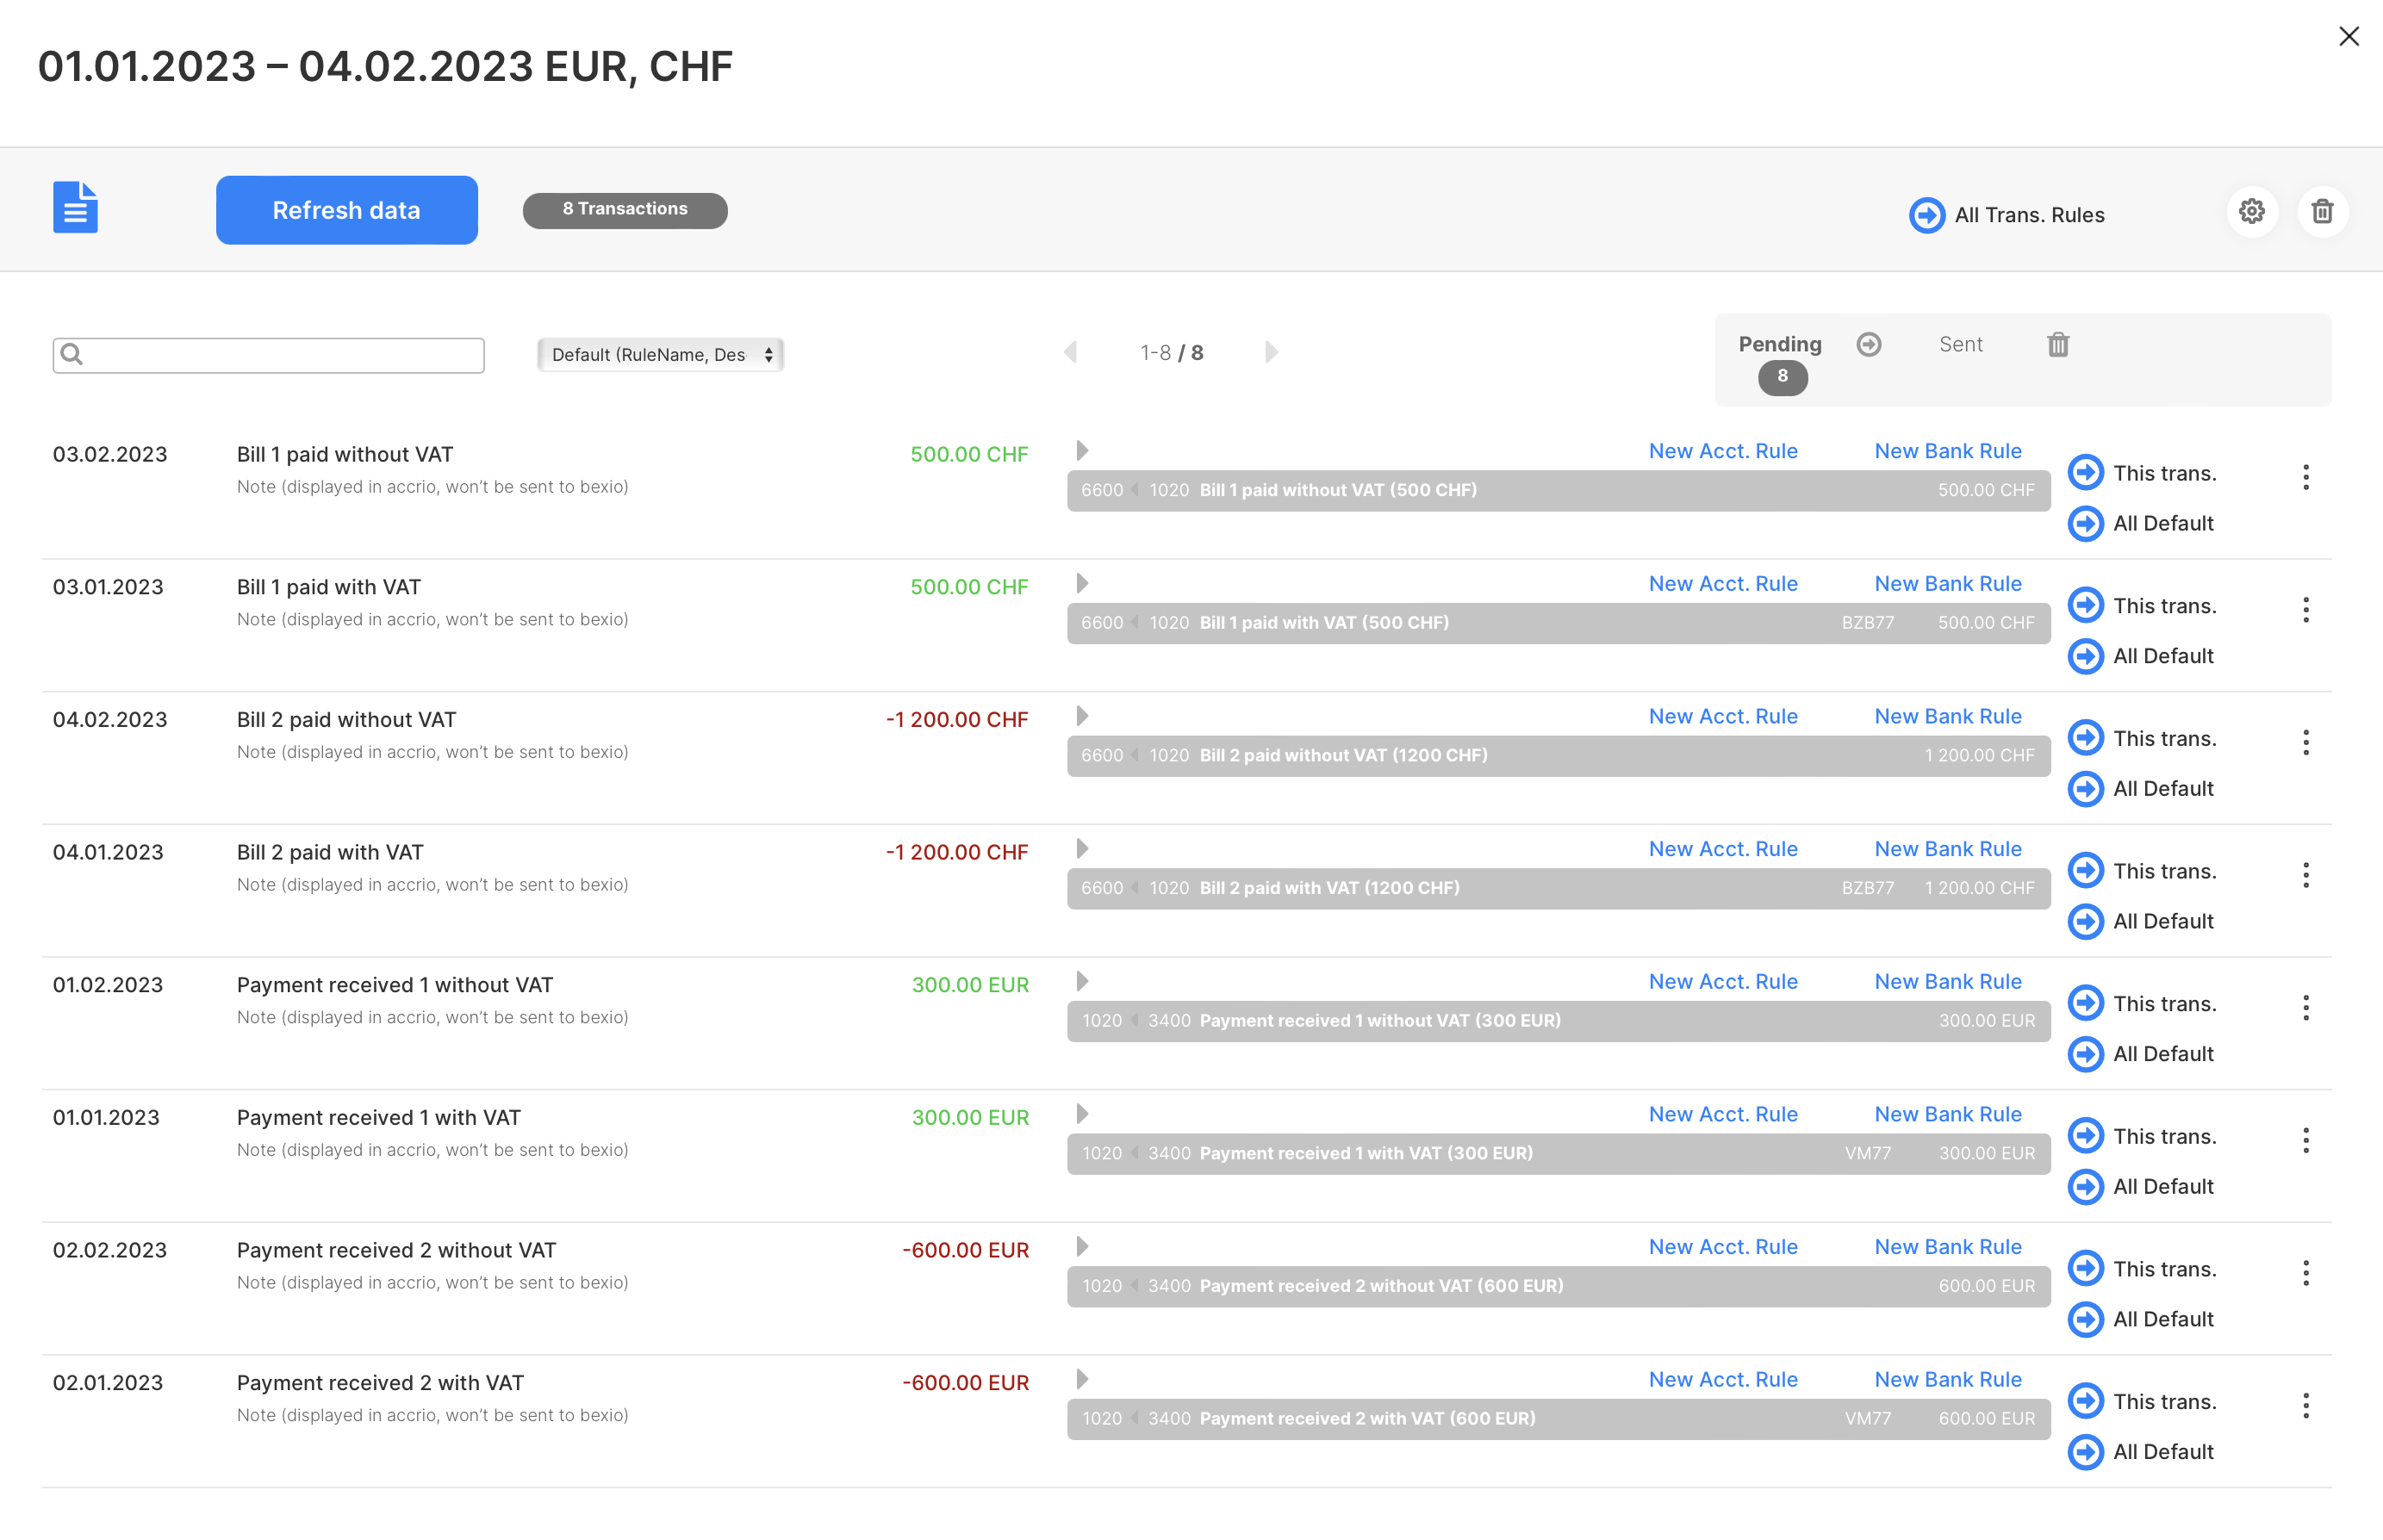
2. Process your first file
If you don't use any additional rules, you can simply click on send All Default to send all transactions to bexio, since the default rule got applied on all transactions.
Otherwise follow this guide to process your first file.
The button Send all transactions on top won't work since it only sends blue transactions (= non-default rule got applied).